
Your angle steel arrives at the yard, and the cutting crew grabs the first bar and lights the torch. Two weeks later, half the frames are twisted and the welders are grinding out bad fits. Good preparation before the first cut prevents almost all of that pain.
To prepare marine angle steel for cutting and fabrication: inspect straightness on arrival, let the bars reach shop temperature, clean mill scale and oil from the cut and weld zones, verify grade against the mill test certificate, mark each piece with its block and frame number, and choose the cutting method that puts the least heat into the section.
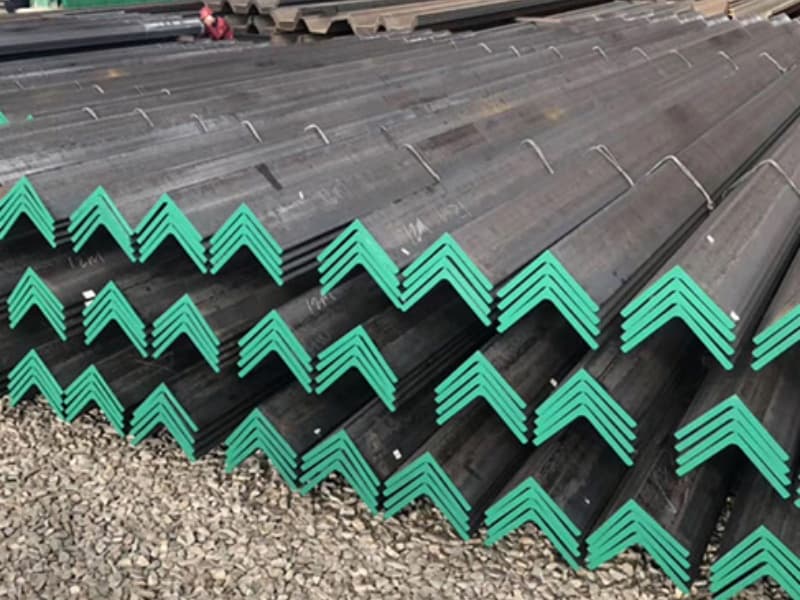
Most fabrication problems I see as an export sales lead do not start at the cutting machine. They start days earlier, in the storage yard, when nobody looked at the steel before it was needed. The good news is that the preparation routine is short, cheap, and it saves far more money than it costs. Let me walk you through the way our best customers in Saudi Arabia, Vietnam, and Malaysia run it.
What Should You Check Before the First Cut?
The bar looks straight on the truck. Then it goes on the cutting table, the torch runs, and the piece comes off with a banana curve. Bad incoming material is the number one hidden cause of rework in angle steel fabrication.
Before the first cut, check five things: straightness against the tolerance, leg dimensions against the drawing, heat number against the mill test certificate, surface condition for scale and rust, and bar temperature. A bar that fails any check should be corrected or rejected before it reaches the cutting table.
I learned this the hard way with a client who bought angle steel from three suppliers in one season to chase the lowest price. One batch looked fine in photos. On the shop floor, the bars had a visible lateral bow. His fitters tried to clamp it out during fit-up. That never works for long. The sections sprang back after welding, and he spent more on straightening labor than he had saved on the steel. Now he inspects every bundle before unloading, and so should you.
Straightness and Dimension Checks
Lay a straightedge or a stretched wire along the web of the bar. Standard mill tolerance for straightness on hot-rolled sections is around 0.2% of length, which means a 12 meter bar can legally bow up to 24 mm. For fabrication work, I tell buyers to order to 0.1% when the design allows it. Twelve millimeters of bow over a 12 meter bar is much easier to work with. If a bar exceeds tolerance, straighten it cold on a press before cutting. Keep the press load below about 70% of the yield strength so you do not work-harden the section. Hot straightening is the fallback, and classification rules cap the heating temperature around 650 °C so the steel structure does not change.
Check the legs with a caliper and an angle square, not with your eye. Leg tolerances on equal-leg angles are small, and a bar at the bottom of the tolerance band can leave you short on weld leg length at the joint. Also verify the leg thickness at several points along the bar. Rolling wear shows up as a taper from one end to the other on poorly maintained mills. Measure both legs on both faces of at least three bars per bundle. If one bar reads 0.3 mm thin at the root, check the whole bundle before your welders discover it at the assembly jig.
Certificate and Surface Condition
Match the heat number stamped or stenciled on the bar to the mill test certificate before anything is cut. Once you cut a bar into thirty pieces, traceability gets expensive. This takes five minutes per bundle and it protects your classification records. Our Gulf Metal Solutions customer in Saudi Arabia does this check at the port before the containers even leave Dammam customs, with SGS watching, because a mismatch found at the port costs a phone call while a mismatch found at final survey costs a claim.
Then look at the surface. Mill scale is normal. Loose rust, laps, slivers, and scabs are not. Heavy scale on the cut line accelerates torch tip wear and leaves a rough edge. Oil or grease near a future weld will cause porosity. Class rules are blunt about this: oil, moisture, scale, rust, and paint must be removed from the edges of parts to be welded before welding. An approved weldable shop primer can stay, but only if the primer itself is class-approved for welding.
Temperature and Rest Before Cutting
One point most guides skip: do not cut steel that just came off a cold truck in winter. Cold steel reacts badly to a sudden heat source, and brittle behavior at the cut edge is a real risk on higher-strength grades. Let the bars sit in the shop and reach a stable temperature. In climates where night temperatures drop below zero, class rules require the edges to be dry and free from frost before any cutting or welding. I walked through a fabricator’s yard in northern China one January morning and watched a crew light a torch on a bar that still had frost in the flange root. The cut edge cracked like a biscuit. Twenty minutes with the bar indoors would have saved that piece.
How Do You Control Heat and Distortion During Cutting?
You prepared the bar perfectly. Then the cutting method puts too much heat into the section, and the bar twists anyway. Preparation includes choosing the right thermal process, not just cleaning the steel.
Control cutting distortion by choosing a low heat-input process, cutting in a planned sequence, supporting the bar along its full length, and letting each cut cool before the next heavy cut runs nearby. Oxygen plasma puts in less than half the heat of oxy-fuel per millimetre, so it distorts the section far less.
A study by the British shipbuilder Harland and Wolff settled this question decades ago. They measured distortion in plates after thermal cutting and found that the cutting operation itself, not the release of rolling stresses, drives most of the movement. Oxy-fuel cutting put roughly 2 to 3 kJ of heat into every millimetre of cut. Oxygen plasma put in less than 1 kJ/mm. The plasma-cut parts stayed dramatically flatter. That is why modern yards have moved their profile cutting to plasma wherever thickness allows.
Cutting Method Selection
Here is the honest comparison I give buyers when they ask which machine their fabricator should use on angle sections. Each method has a place. The mistake is using one tool for everything.
| Method | Typical accuracy | Heat-affected zone | Speed | Best use on angle steel |
|---|---|---|---|---|
| CNC plasma | about ±0.5 mm | 2–3 mm | Fast | Production runs of straight cuts and copes |
| Band saw | about ±0.2 mm | None | Medium | Miters, short pieces, clean cut faces |
| Oxy-fuel | about ±2 mm | 5–8 mm | Medium | Thick legs above 25 mm, bevel in one pass |
| Abrasive saw | about ±1 mm | Small | Slow | Field cuts and small adjustments |
Remember the kerf when you plan. A band saw blade removes about 3 mm of material, and a plasma arc removes 2 to 4 mm depending on amperage and tip condition. A cut list that ignores kerf delivers parts that are consistently short. I reviewed one purchase order where every frame came out 3 mm under length because the programmer forgot compensation on 900 pieces. None of them were scrap, but every one needed rework at the joint.
Cut Sequence and Support
Support the bar along its whole length during cutting. A 12 meter angle bar held at two ends sags in the middle, and the torch follows the sag, so the finished piece inherits the curve. Roller conveyors or simple timber packers every 2 meters fix this for almost no cost.
Plan the cut order on multi-piece bars. Cut the shortest pieces from the middle first and work outward, or stagger long cuts so the bar never has one long open slit acting as a hinge. On nested layouts, alternate the cut direction between pieces. These sound like small habits. On a 200-piece frame order, they are the difference between a straight stack and a twisted one.
Marking Before You Cut
Mark every piece before it leaves the cutting table. Block number, frame number, piece ID, and an orientation mark such as TOP or FWD. Dry-ink markers on hot steel disappear, so use a low-stress steel stamp or paint pen on the web face, away from weld zones. I watched a yard in Malaysia cut 200 bars with only a length chalked on each end. When the blocks came together, nobody knew which bar went where, and they lost three weeks sorting. Five seconds of marking per piece would have saved all of it.
How Do You Prepare Cut Edges for Clean Welds?
The pieces are cut. The crew is ready to weld. Then the welds come out porous and the surveyor rejects the frame. The problem is almost always the edge condition, not the welder.
Prepare cut edges for welding by removing slag and burrs, grinding to bright metal in the weld zone, checking the fit-up gap, drying the joint area, and beveling thick legs to the specified angle before the first tack goes down.
Class rules treat edge preparation as part of weld quality, not a cosmetic step. Edges must be prepared by methods that give the required joint quality, and all contamination must go. Here is what that means at the bench.
Cleaning the Weld Zone
Grind both faying surfaces back to shiny metal for at least 20 mm on each side of the joint line. Mill scale is an oxide layer, and it does not melt into the weld cleanly. It either floats into the bead as inclusion or burns off as gas that leaves porosity. Oil is worse. A single fingerprint of grease can put scattered porosity through a whole fillet. Use a clean grinding disc dedicated to carbon steel. A disc that touched stainless or aluminum leaves contamination that shows up as defects.
After grinding, wipe the joint with a clean rag. In humid coastal yards, moisture on the joint is the silent killer. Hydrogen from damp surfaces causes underbead cracking on higher-strength grades like AH36 angle. Dry the joint with a heat gun before welding when the shop air is damp. Low-hydrogen consumables help, but they only work if they are baked and stored properly too. Electrodes that sat open overnight absorb moisture from the air, and no amount of edge cleaning fixes a damp electrode. Give your storeman a baking oven and the authority to reject a damp packet, and your crack complaints will drop to almost zero.
Fit-Up and Beveling
Check the gap before tacking. For a fillet between the angle and the plating, keep the gap within about 1 mm. For butt joints between two angle sections, aim for 2 to 4 mm so the weld gets full penetration. A gap too tight gives lack of fusion at the root. A gap too wide needs a backing bar and doubles the weld volume.
Legs above about 8 mm that will be butt welded need a bevel, usually 30 to 35 degrees per side for a double-V or 45 to 50 degrees for a single-V. A plasma cutter with a bevel head or a grinder can do short production runs. Keep the bevel face clean after beveling, because the bevel face becomes part of the weld. Tack welds deserve the same discipline as final welds: 50 mm long, spaced about every 500 mm, made with qualified consumables by qualified hands. A cracked tack becomes a crack in the finished weld, and class surveyors know exactly where to look for them.
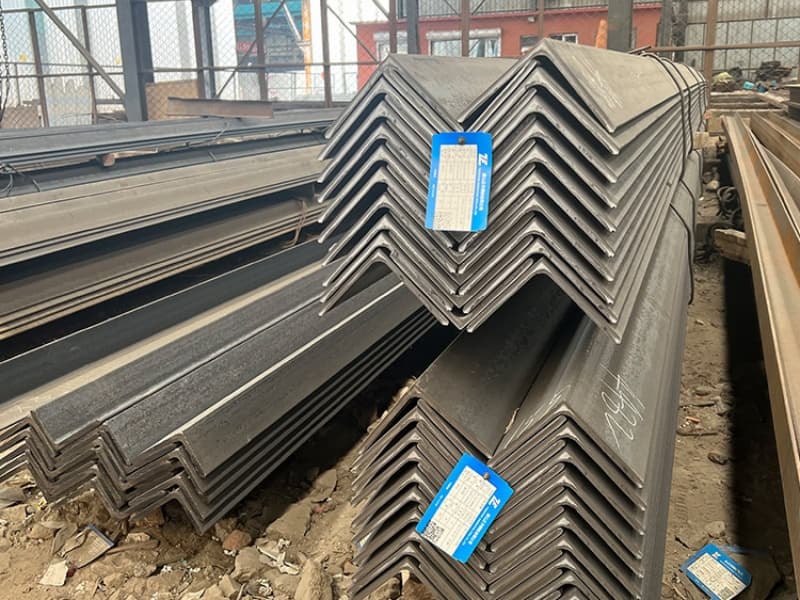
One more habit worth copying. Our best Gulf-region customer runs a first-piece inspection on every new cutting job: the foreman measures the first finished piece against the drawing, signs the tag, and only then does the machine run the rest. It costs twenty minutes. His rework rate is a small fraction of what I see at yards that cut everything first and measure later. In my experience, that sign-off culture tells you more about a fabricator than any certificate on the wall.
Conclusion
Prepare the steel before the torch lights: check straightness and certificates, clean and dry every joint, choose low-heat cutting, and inspect the first piece. Careful preparation is the cheapest rework prevention you will ever buy.