
A ship’s hull without angle steel is like a skeleton without ribs. It will collapse under the first big wave.
Marine angle steel is used as stiffeners and frames inside the hull. It runs along the sides, bottom, and deck to stop the steel plates from bending. You will find it as longitudinal stiffeners, transverse frames, stringers, and web frames. I have supplied angle steel for hull frameworks in Vietnam, Mexico, and Saudi Arabia.
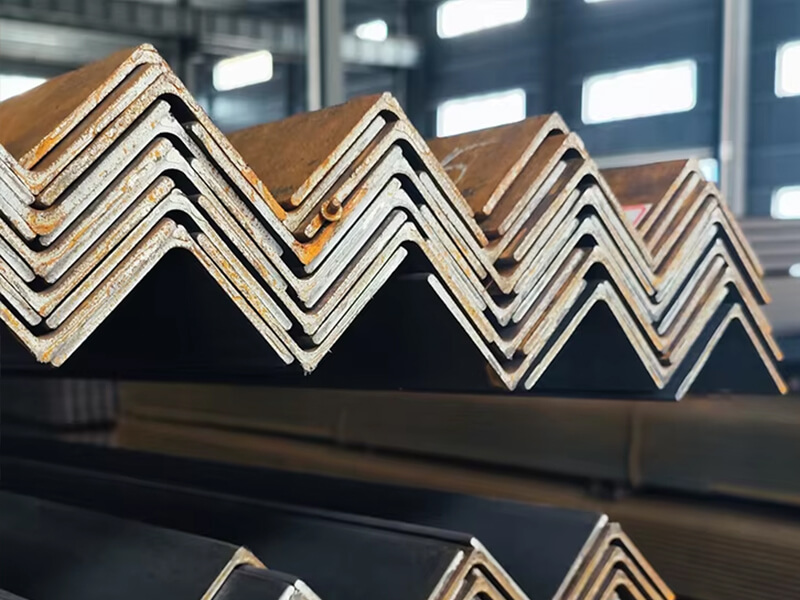
You might look at a ship’s hull and only see the outer plates. But the real strength comes from the angle steel hidden inside. Let me walk you through where it goes, what sizes to pick, how to weld it, and why orientation matters.
Where Is Marine Angle Steel Placed Inside a Ship’s Hull Framework?
You open a ship’s cargo hold. You see a grid of steel bars welded to the plates. That grid is mostly angle steel. But where exactly does each piece go?
Marine angle steel1 is placed in four key locations: longitudinal stiffeners2 (running front to back), transverse frames3 (running side to side), stringers4 (horizontal beams along the side), and web frames5 (deep vertical supports). Each location has a different job. Longitudinals stop the bottom from buckling. Transverse frames hold the side shell. I have seen many new shipbuilders mix up these positions. That leads to weak hulls.
Let me draw you a picture with words and examples.
I am Zora Guo. I export marine angle steel to shipyards in more than 15 countries. One of my buyers in Pakistan was building a small cargo ship. He ordered 50 tons of angle steel. But his workers did not know where to put each size. They used thick angle steel in light-duty areas and thin angle steel in high-stress areas. The hull failed its first inspection. He had to cut out and re-weld 20% of the frames. That cost him $25,000.
So here is the correct placement for marine angle steel in a typical commercial vessel.
Location 1 – Longitudinal stiffeners (bottom and side)
Longitudinal stiffeners run from the bow to the stern (front to back). They are welded to the bottom plates and the side plates. Their job is to stop the plates from bending when the ship hits waves.
- Typical size: 150x150x12mm or 200x200x15mm for large vessels
- Spacing: 500mm to 800mm apart
- Direction: Parallel to the ship’s center line
Location 2 – Transverse frames (side shell and bulkheads)
Transverse frames run from the bottom to the deck (up and down). They hold the side shell and the bulkheads. They work like the ribs of an animal.
- Typical size: 100x100x10mm or 120x120x12mm for medium vessels
- Spacing: 600mm to 900mm apart
- Direction: Perpendicular to the ship’s center line
Location 3 – Stringers (horizontal beams on the side)
Stringers are long angle bars that run horizontally along the inside of the side shell. They connect the transverse frames together. They add strength to the whole side structure.
- Typical size: 150x150x12mm or 200x200x15mm
- Number: 2 to 4 stringers per side, depending on ship depth
Location 4 – Web frames (deep vertical supports)
Web frames are extra-strong transverse frames. They are placed every 3 to 5 regular frames. They are made of heavier angle steel or built-up sections. They carry big loads from the deck and the bottom.
- Typical size: 200x200x15mm or larger (sometimes 250x250x18mm)
- Spacing: 3 to 5 meters apart
Here is a simple table to help you remember:
| Location | Direction | Typical size (mm) | Primary job |
|---|---|---|---|
| Longitudinal stiffeners | Front to back (bottom) | 150x150x12 | Stop bottom buckling |
| Transverse frames | Bottom to deck (side) | 100x100x10 | Hold side shell |
| Stringers | Front to back (side) | 150x150x12 | Connect frames |
| Web frames | Bottom to deck (deep) | 200x200x15 | Carry heavy loads |
I remember a repair project in Malaysia. The ship had heavy corrosion on the bottom longitudinals. The owner wanted to replace only the damaged sections. But I told him: “Check the spacing first.” The original spacing was 800mm. That was too wide for the ship’s new route. He ended up adding extra longitudinal stiffeners. That cost more money upfront. But it saved the hull from cracking later.
So my advice: Always follow the class society rules6 for spacing and placement. Do not guess.
What Sizes and Grades of Angle Steel Work Best for Hull Framing?
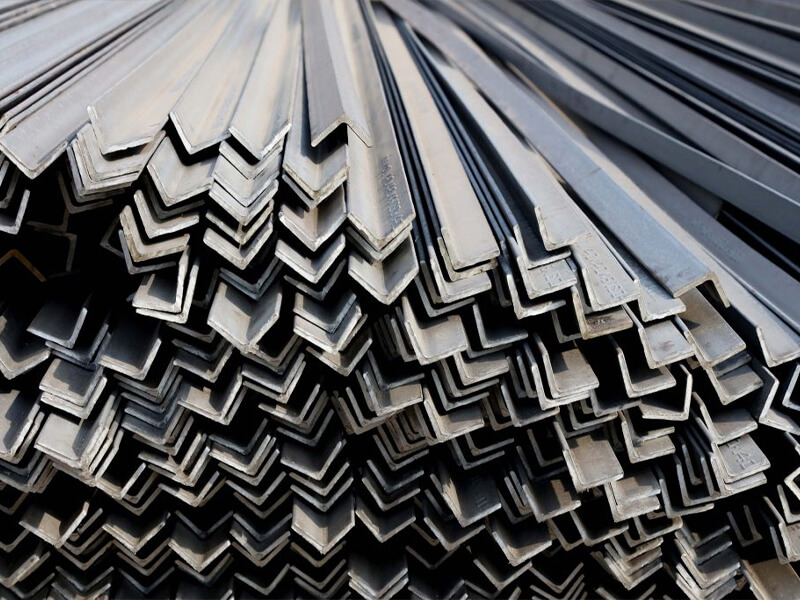
You walk into a steel yard. You see angle bars from 50x50mm up to 250x250mm. How do you pick the right one for your hull?
The best sizes for hull framing1 are 100x100x10mm, 150x150x12mm, and 200x200x15mm. For grades, use A362 for non-critical frames on small vessels. Use AH363 for all main frames on large commercial ships. I have supplied these sizes to shipbuilders in Qatar and Romania for tankers and bulk carriers.
5 for hull framing](https://cnmarinesteel.com/wp-content/uploads/2026/01/Marine-angle-steel-54.webp)
Let me break down the selection process by ship type and stress level.
I am Zora Guo. A buyer in Vietnam once asked me: “Why can’t I use 75x75x8mm for everything? It is cheaper.” I told him: “That is like using toothpicks to hold up a house. It will break.” So let me explain how to choose.
Size selection by ship size and location
The size of angle steel depends on the ship’s length and the expected wave loads.
For small vessels (under 50 meters) – Use 80x80x8mm or 100x100x10mm for transverse frames. Use 120x120x10mm for bottom longitudinals.
For medium vessels (50 to 150 meters) – Use 100x100x10mm for upper side frames. Use 150x150x12mm for bottom longitudinals and main deck frames. Use 200x200x15mm for web frames.
For large vessels (over 150 meters) – Use 150x150x12mm for most frames. Use 200x200x15mm for bottom longitudinals and stringers. Use 250x250x18mm for web frames in the midship area.
Grade selection by stress and temperature
Grade A (235 MPa yield) – Use only for:
- Internal non-structural frames (like inside tanks)
- Small vessels under 20 meters
- Areas with very low wave loads
Do not use Grade A for the main hull framework of any large commercial vessel.
Grade A36 (same as Grade A, but ASTM standard) – Same limitations as Grade A. It is mild steel.
Grade AH36 (355 MPa yield) – Use for:
- All main frames on vessels over 50 meters
- Bottom longitudinals and bottom transverse frames
- Stringers and web frames
- Any frame that carries heavy cargo loads
Grade DH366 (355 MPa yield, better low-temperature toughness) – Use for:
- Frames on ships that sail to cold regions (North Atlantic, Baltic Sea)
- Deck frames that get sprayed with cold water
My rule of thumb
For 90% of commercial vessels (oil tankers, bulk carriers, container ships), use AH36 angle steel for all structural frames. Use 150x150x12mm as your standard size. Then use 100x100x10mm for lighter areas and 200x200x15mm for heavier areas.
Here is a selection table:
| Ship type | Length | Main frames (grade & size) | Web frames (grade & size) |
|---|---|---|---|
| Small fishing boat | 20-30m | A36 / 80x80x8 | Not needed |
| Coastal cargo ship | 50-80m | AH36 / 100x100x10 | AH36 / 150x150x12 |
| Bulk carrier | 150-200m | AH36 / 150x150x12 | AH36 / 200x200x15 |
| Oil tanker | 200-250m | AH36 / 150x150x15 | AH36 / 200x200x15 or 18 |
| Container ship | 250-300m | AH36 or DH36 / 150x150x15 | DH36 / 200x200x18 |
I recently supplied 300 tons of AH36 150x150x12mm angle steel to a shipyard in Saudi Arabia. They were building a 120-meter cargo ship. The frames passed all tests. The buyer told me: “The dimensions were consistent on every single bar.” That is what you get from a good mill.
How to Weld and Install Angle Steel Frames for Maximum Strength?
You have the right angle steel. You cut it to length. Now you weld it to the hull plate. But if you weld wrong, the frame will lose half its strength.
To weld angle steel frames1 correctly, use a fillet weld2 on both sides of each leg. The weld throat thickness3 must be at least 0.7 times the angle steel thickness. Weld in a sequence that balances the heat. Start from the middle and work outward. I have seen frames crack because the welder put all the welds on one side first. That twisted the whole frame.
Let me show you the right way, step by step.
I am Zora Guo. A buyer in the Philippines once sent me photos of a failed frame. The angle steel had cracked right next to the weld. I asked: “How did you weld it?” He said: “We welded one leg completely. Then we welded the other leg.” That was the mistake. The first leg got too much heat. The steel became brittle. So here is the correct procedure.
Step 1 – Prepare the surface
Clean the hull plate and the angle steel. Remove rust, paint, oil, and mill scale. Use a grinder. The weld area must be shiny metal. Any dirt will cause porosity (tiny holes in the weld).
Step 2 – Position the angle steel
Place the angle steel against the hull plate. The two legs of the angle should touch the plate. Use temporary tack welds to hold it in place. Tack welds should be 50mm long and placed every 500mm.
Step 3 – Choose the right weld size
The weld is called a fillet weld. It goes into the corner between the angle leg and the plate. The most important number is the throat thickness. This is the shortest distance from the root of the weld to its face.
Rule: Throat thickness must be at least 0.7 times the thickness of the angle steel leg.
Example: If your angle steel leg is 12mm thick, the throat thickness must be at least 8.4mm. That means the weld leg length (the visible part) should be about 12mm.
Step 4 – Weld in the correct sequence
Do not weld one leg completely first. Instead, weld both legs at the same time in small segments.
Here is a good sequence:
- Weld a 100mm segment on one leg near the middle of the frame.
- Then weld a 100mm segment on the other leg at the same middle position.
- Move 500mm to one side. Weld another 100mm segment on the first leg.
- Then weld the matching segment on the second leg.
- Repeat until the whole frame is welded.
This sequence balances the heat. It stops the angle steel from twisting or bending.
Step 5 – Avoid common mistakes
Mistake 1 – Undercut – This is a groove melted into the hull plate next to the weld. It weakens the plate. To avoid it, do not use too much current. Keep the welding speed steady.
Mistake 2 – Lack of fusion – The weld does not stick to the angle steel. This happens when the angle steel is dirty or the welder moves too fast. Grind out the bad weld and redo it.
Mistake 3 – Overlap – The weld metal rolls over without fusing to the plate. Use the right angle on the welding torch.
Here is a quick checklist for your welding team:
| Check item | Target | Tool |
|---|---|---|
| Surface cleanliness | Shiny metal, no rust | Visual |
| Tack weld spacing | Every 500mm | Tape measure |
| Weld throat thickness | ≥0.7 x angle thickness | Weld gauge |
| Weld sequence | Balanced, both legs together | Visual |
| No undercut or overlap | Smooth transition to plate | Visual and gauge |
I remember a buyer from Thailand. His welders were fast but sloppy. They welded all the frames on one side first. The angle steel twisted. The frames did not line up with the next ones. He had to cut out 50 frames and redo them. That cost him two weeks. So take the time to weld right the first time.
Why Does Angle Steel Orientation Affect Hull Integrity and Fatigue Life?
You can use the same size angle steel. But if you turn it the wrong way, the hull will crack sooner. Orientation is not a small detail.
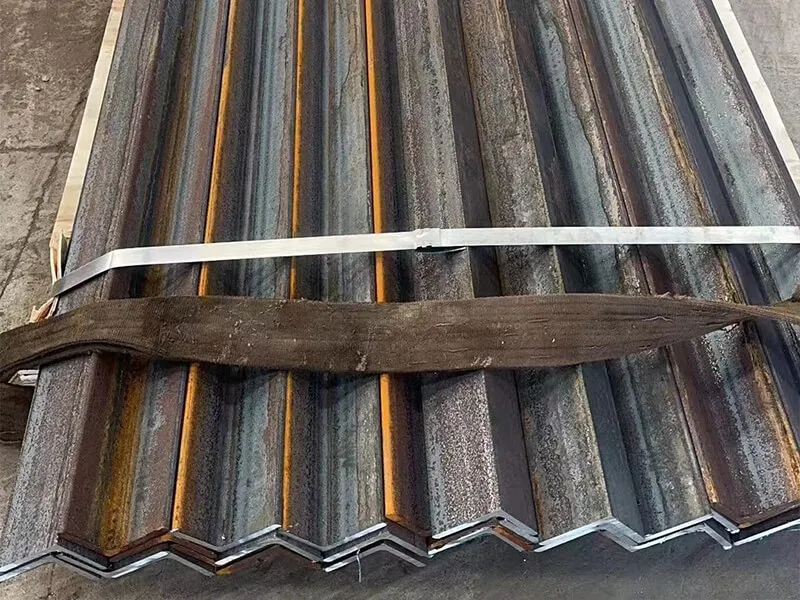
Angle steel orientation1 matters because the load comes from a specific direction. If you place the angle with one leg parallel to the load, the stiffener is strong. If you turn it 90 degrees, the stiffener becomes weak. For bottom longitudinals, the vertical leg should point up. For side frames, the horizontal leg should point toward the cargo. I have seen fatigue cracks start at the toe of a wrongly oriented angle.
[^2] [fatigue life](https://www.structuremag.org/article/fatigue-analysis-of-concrete-structures/)[^3]](https://cnmarinesteel.com/wp-content/uploads/2026/01/Marine-angle-steel-43.jpg)
Let me explain the science in plain words.
I am Zora Guo. A buyer in Mexico once sent me a photo of a cracked angle frame. The crack started right at the weld toe4. I asked: “Which way is the angle pointing?” He sent another photo. The horizontal leg was pointing up, not toward the cargo. The load from the cargo pushed the angle sideways. That caused the crack. So here is the rule.
Equal leg vs. unequal leg angle steel
Equal leg angle has both legs the same length (e.g., 150x150mm). Unequal leg angle has one leg longer than the other (e.g., 200x150mm). For hull framing, equal leg is more common. Unequal leg is used when one direction needs more stiffness.
The orientation rule for bottom longitudinals5
On the bottom of the ship, waves push up. The load comes from below. The angle steel should have one vertical leg pointing up (away from the plate). The horizontal leg sits on the plate. This orientation gives the highest stiffness against the upward wave load.
If you lay the angle flat (both legs horizontal), it will bend like a wet noodle.
The orientation rule for side frames
On the side shell, the load comes from the water outside and the cargo inside. The angle steel should have one leg pointing toward the cargo (horizontal). The other leg is vertical against the side plate. This stops the side plate from pushing inward.
How orientation affects fatigue life
Fatigue cracks start at sharp corners. The weld toe between the angle leg and the plate is a sharp corner. If the load direction is perpendicular to the weld, the crack grows fast. If the load direction is parallel to the weld, the crack grows slow.
So you want the longest leg of the angle to be parallel to the main load direction.
Here is a simple rule: The leg that carries the load should be the one welded to the plate. The other leg (the free leg) should point toward the load.
Common orientation mistakes
Mistake 1 – Reversed bottom longitudinal – The vertical leg points down instead of up. The wave load tries to peel the weld open. Fatigue life drops by 50%.
Mistake 2 – Side frame pointing outward – The horizontal leg points toward the water instead of the cargo. When the ship rolls, the cargo pushes the frame outward. The weld cracks.
Mistake 3 – Using unequal leg backwards – The longer leg is put in the direction with less load. The shorter leg is put in the heavy load direction. This wastes steel.
Here is a summary table:
| Location | Correct orientation | Wrong orientation | Result of wrong |
|---|---|---|---|
| Bottom longitudinal | Vertical leg up | Vertical leg down | Weld peels, crack grows |
| Side frame | Horizontal leg toward cargo | Horizontal leg toward water | Frame bends inward |
| Deck longitudinal | Vertical leg down | Vertical leg up | Deck plate oilcans |
| Web frame | Both legs perpendicular to plate | One leg parallel to plate | Low stiffness |
I always tell my buyers: “Take a photo of your first frame. Send it to me. I will tell you if the orientation is correct.” One buyer in Romania did that. He sent me a photo. I saw the bottom longitudinal was upside down. He fixed it before welding the rest. That saved him from a major repair later.
Conclusion
Place angle steel in the right spots. Pick the correct sizes and grades. Weld with balance. And always check your orientation.
My Personal Insights (from 10+ years in marine steel export)
I am Zora Guo. My team in Liaocheng supplies marine angle steel for hull frameworks. We offer AH36 and A36 in sizes from 80x80x8mm up to 250x250x18mm. We support third-party inspection and flexible MOQ. Send me an email at sales@chinaexhaustfan.com or visit cnmarinesteel.com. Tell me your ship type, frame spacing, and class society. I will send you a size and grade recommendation within 24 hours.
-
Understanding angle steel orientation can prevent costly structural failures and enhance the integrity of your projects. ↩ ↩ ↩ ↩
-
Exploring hull integrity factors can help ensure the longevity and safety of marine vessels. ↩ ↩ ↩
-
Learn about fatigue life to improve the durability and performance of your engineering designs. ↩ ↩ ↩
-
Learn about weld toes to enhance your welding techniques and prevent structural failures. ↩ ↩
-
Understanding this rule is crucial for maintaining the structural integrity of ships. ↩ ↩ ↩
-
Find out how Grade DH36 can improve your ship’s performance in cold environments. ↩ ↩