
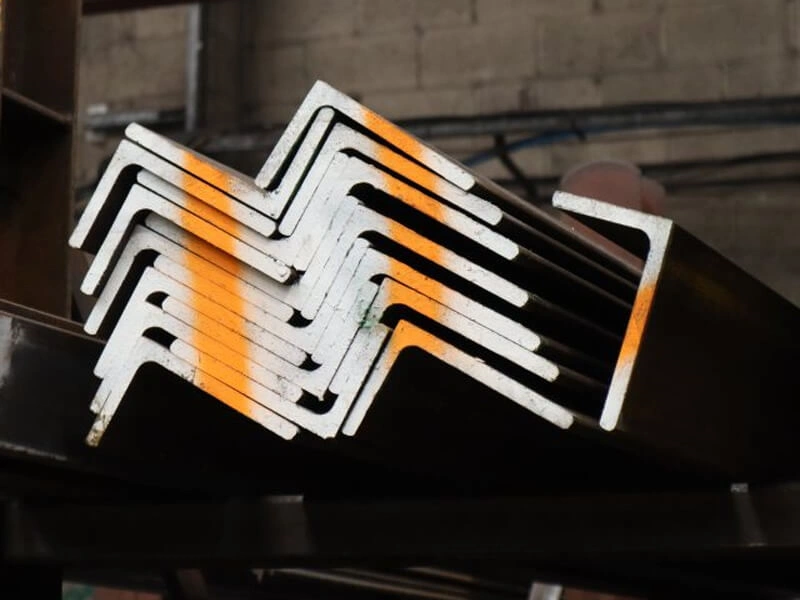
You order 150x150x12mm angle steel. It arrives. Your ruler says 148mm. The supplier’s certificate says 151mm. Who is right? The dispute starts.
To avoid dimensional disputes, write every detail in your contract: leg length, thickness, angle, straightness, and the exact tolerance standard (EN 10056 or ASTM A6). Agree on measurement methods and tools before shipment. Know which deviations cause rejection. And do a joint pre-shipment inspection. I have resolved many disputes by following these four steps with buyers in Vietnam, Mexico, and Saudi Arabia.

Dimensional disputes waste time and money. Let me show you how to stop them before they start.
What Dimensional Details Must Be Clearly Written in Your Purchase Contract?
A vague contract is a recipe for dispute. “150x150x12mm angle steel” is not enough. You need the full specification.
Your purchase contract must include five dimensional details1: nominal leg length2 with allowed tolerance (e.g., ±1.5mm), nominal thickness with tolerance (e.g., ±0.5mm), angle between legs3 (90° ± 1°), straightness (e.g., 3mm per meter), and the standard you are following (EN 10056 Class A or ASTM A6). Without these, the supplier can ship steel that meets no standard. I helped a buyer in Pakistan add these details to his contract. His next shipment had zero disputes.
Let me write out exactly what to put in your contract.
I am Zora Guo. I have seen too many contracts that just say “150x150x12mm angle steel, AH36.” That is not enough. The mill might follow EN 10056, but the buyer expects ASTM A6. The tolerances are different. Dispute happens.
Clause 1 – Leg length tolerance
Write: “Leg length shall be 150mm nominal. Tolerance per EN 10056 Class A: for nominal leg length 150mm, minus tolerance -1.0mm, plus tolerance +2.0mm. Measured at three points (both ends and middle) on each piece.”
For unequal leg angle, specify both legs separately.
Clause 2 – Thickness tolerance
Write: “Thickness shall be 12mm nominal. Tolerance per EN 10056: for nominal thickness 12mm, minus tolerance -0.5mm, plus tolerance +0.6mm. Measured at the middle of each leg, away from the corner.”
Clause 3 – Angle tolerance
Write: “The angle between the two legs shall be 90° nominal. Tolerance ±1°. Measured with a digital protractor or angle gauge at both ends of each piece.”
Clause 4 – Straightness tolerance
Write: “The total bow (deviation from straight line) shall not exceed 3mm per meter of length, with a maximum of 6mm over any 6m length. Measured on a flat surface with a feeler gauge.”
Clause 5 – Length tolerance
Write: “The cut length shall be 12,000mm nominal. Tolerance +5mm / -0mm. No minus tolerance allowed.”
Clause 6 – Reference standard
Write: “All dimensional tolerances shall follow EN 10056 Class A (or ASTM A6, or JIS G3192). In case of conflict, EN 10056 Class A shall govern.”
Here is a sample contract clause you can copy:
Dimensional requirements for L-shaped angle steel:
- Leg length: 150mm nominal, tolerance -1.0 / +2.0 mm per EN 10056 Class A
- Thickness: 12mm nominal, tolerance -0.5 / +0.6 mm per EN 10056
- Angle: 90° ± 1°
- Straightness: ≤3mm per meter, max 6mm total per 6m length
- Cut length: 12,000mm, tolerance +5 / -0 mm
- Measurement method: steel ruler for length, caliper for thickness, angle gauge for angle, straight edge and feeler for straightness
I send this clause to every buyer. One buyer in Romania told me: “I used your clause and the supplier delivered exactly what I ordered. No arguments.”
How to Agree on Measurement Methods and Tools Before Shipment?
You measure with a caliper. The supplier measures with a tape measure. You get different numbers. Then you argue.
Agree on measurement methods and tools1 before shipment. Specify the tool type (digital caliper2 with 0.1mm resolution for thickness, steel ruler for leg length, angle gauge for 90°). State where to measure (at the middle of the leg for thickness, away from the corner). And agree on how many points per piece (three points: both ends and middle). I lost a dispute once because the supplier measured thickness at the corner (which is thicker). Now I write the method in every contract.
Let me give you a clear measurement protocol.
I am Zora Guo. A buyer in Thailand rejected a shipment because his caliper showed 11.4mm thickness instead of 12mm. The supplier insisted the steel was 12mm. I asked: “Where did you measure?” The supplier measured at the corner. The buyer measured in the middle of the leg. The corner is always thicker due to the rolling process. That was the dispute. Now I always specify the measurement point.
Tool specification
| Dimension | Tool | Resolution required | Calibration |
|---|---|---|---|
| Leg length | Steel ruler or tape measure | 1mm | Certified within 1 year |
| Thickness | Digital caliper or micrometer | 0.1mm | Certified within 1 year |
| Angle | Digital protractor or angle gauge | 0.5° | Certified within 1 year |
| Straightness | Straight edge (1m) + feeler gauge | 0.1mm | Visual check |
| Length | Steel tape measure | 1mm | Certified within 1 year |
Measurement points
- Leg length: Measure at three points: 50mm from one end, at the middle, and 50mm from the other end. Take the average of the three readings.
- Thickness: Measure at the middle of the leg, at least 20mm away from the corner. Measure at the same three points along the length.
- Angle: Measure at both ends of the piece. Place the angle gauge firmly against the inside corner.
- Straightness: Place the straight edge along the length. Measure the gap at the midpoint with a feeler gauge.
- Length: Measure along the centerline of the leg from end to end.
How to write it in your contract
Add this clause:
Measurement method:
- Thickness shall be measured with a digital caliper (0.1mm resolution) at the middle of each leg, 20mm from the corner, at three points along the length (both ends and middle).
- Leg length shall be measured with a steel ruler (1mm resolution) at three points along the length.
- Angle shall be measured with a digital protractor at both ends of the piece.
- Straightness shall be measured with a 1m straight edge and feeler gauge at the midpoint.
- All measuring tools must have a valid calibration certificate3 dated within the last 12 months.
What to do if your tools do not match
If the buyer’s measurement and the supplier’s measurement differ by less than 0.3mm for thickness or 1mm for leg length, accept the supplier’s measurement as the tolerance range allows variation. If the difference is larger, use a third-party inspector4 with calibrated tools as the referee.
I now send a photo of my calibrated caliper to buyers before shipping. I say: “This is the tool I use. Please use a similar tool.” That stops arguments.
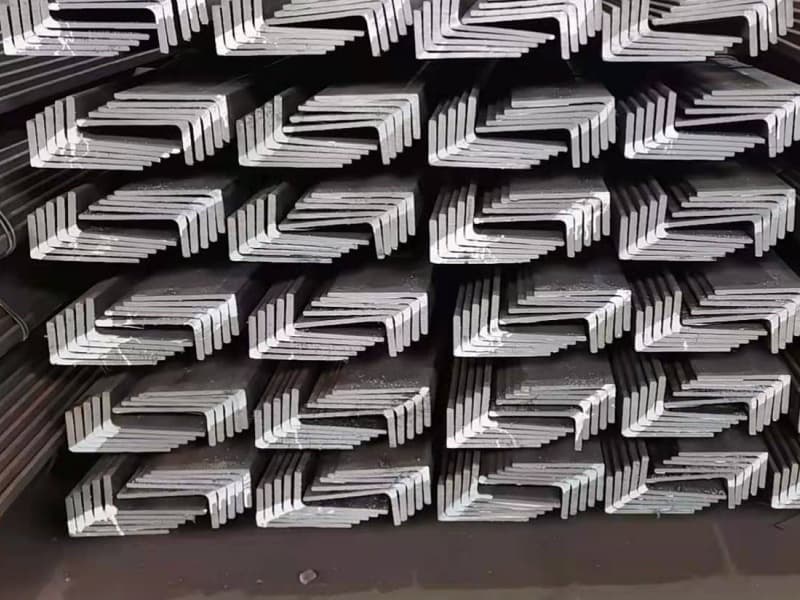
Which Dimensional Deviations Most Often Lead to Rejection and Claims?
Not every small deviation causes a claim. Some are more common and more serious than others.
The three most common rejection reasons are: leg length shorter than minus tolerance1 (e.g., 148mm instead of 150mm), thickness below tolerance2 (e.g., 11.4mm instead of 12mm), and angle outside 89-91°3 (e.g., 87° or 93°). Straightness problems (bowed steel) and twist4 are also frequent claims. I have rejected shipments for all of these. The worst was a batch with angle deviation of 5° – the frames would not fit at all.
Let me list the most common problems and their acceptance limits.
I am Zora Guo. A buyer in Mexico once received a shipment of L-shaped steel. He called me: “Zora, the legs are uneven. One leg is 150mm, the other is 145mm.” I asked: “What does your contract say?” He had not specified a tolerance for unequal legs. The supplier argued that 145mm was within “standard tolerance” for a 150mm leg (it is not). The dispute took three months to resolve.
Problem 1 – Short leg length
This is the most common rejection. The leg is shorter than the minus tolerance.
| Nominal leg length (mm) | Minus tolerance (mm) | Reject if leg length < |
|---|---|---|
| 100 | -0.8 | 99.2 |
| 150 | -1.0 | 149.0 |
| 200 | -1.5 | 198.5 |
If your 150mm leg measures 148.5mm, reject it. It is too short. The frame will be weak.
Problem 2 – Thin thickness
Thickness below tolerance is the second most common rejection.
| Nominal thickness (mm) | Minus tolerance (mm) | Reject if thickness < |
|---|---|---|
| 10 | -0.5 | 9.5 |
| 12 | -0.5 | 11.5 |
| 15 | -0.6 | 14.4 |
| 20 | -0.8 | 19.2 |
A 12mm bar that measures 11.4mm is too thin. It has 5% less strength.
Problem 3 – Angle out of square
The angle between legs should be 90° ± 1°. If it is 87° or 93°, the frame will not fit the hull plate. The gap will be too big or too small.
Reject if angle 91°.
Problem 4 – Bow or twist
Straightness: more than 3mm per meter is a reject. For a 12m bar, more than 6mm total bow is a reject.
Twist: The legs should not twist along the length. A twist of more than 2mm per meter is a reject. Measure by placing the bar on a flat surface. The gap under the other leg should be less than 2mm per meter.
Problem 5 – Uneven legs (for equal-leg angle)
Both legs should be the same length within ±1mm. If one leg is 150mm and the other is 148mm, reject it. The difference will cause fit-up problems.
Summary table of rejection limits (EN 10056 Class A)
| Parameter | Nominal | Acceptable range | Reject if |
|---|---|---|---|
| Leg length (150mm) | 150mm | 149.0 – 152.0mm | 152.0 |
| Leg difference (equal leg) | 0mm | 1.0mm | |
| Thickness (12mm) | 12mm | 11.5 – 12.6mm | 12.6 |
| Angle | 90° | 89 – 91° | 91° |
| Straightness | 0mm/m | ≤3mm/m | >3mm/m |
| Twist | 0mm/m | ≤2mm/m | >2mm/m |
I give this table to every buyer. They print it and put it on the inspection table. No more “is this acceptable?” questions.
Why Is a Pre-Shipment Joint Inspection the Best Way to Stop Disputes?
You can write a perfect contract. You can agree on tools. But if you never check the steel before it ships, you are gambling.
A pre-shipment joint inspection1 means you or your third-party inspector (SGS, BV, Intertek2) goes to the supplier’s warehouse. You measure the steel together. You agree on the results before loading. Any non-conforming steel is set aside. The good steel ships. This stops disputes because the buyer and supplier agree on the dimensions before the steel leaves China. I have done joint inspections for buyers in Malaysia and Qatar. Not a single dispute after.
Let me explain how to set up a joint inspection.
I am Zora Guo. A buyer in Saudi Arabia used to have disputes with every shipment. He would measure the steel at his yard. The supplier would say “it was fine when it left.” The buyer had no proof. I suggested a joint inspection at my warehouse in Liaocheng. He hired SGS. The SGS inspector measured every bundle with me. We agreed on the results. The buyer received the steel and measured again. The numbers matched. He has used joint inspection for every order since.
Step 1 – Write joint inspection into your contract
Add this clause: “All steel shall be subject to joint dimensional inspection3 at the supplier’s warehouse before loading. The buyer may send his own inspector or appoint a third party (SGS, BV, Intertek). The inspection shall follow the measurement methods and tolerances defined in this contract. Any piece that fails the inspection shall be removed and replaced at the supplier’s cost.”
Step 2 – Choose an inspector
You have three options:
- Send your own quality engineer4 – Best for large projects. You control the process. Cost: travel + time.
- Hire SGS, BV, or Intertek – Professional, neutral, and accepted by all class societies. Cost: $300-800 per day plus travel.
- Ask the supplier to video the inspection – Cheapest, but less reliable. You can watch live on WhatsApp video.
Step 3 – Agree on the sampling plan5
For most shipments, inspect 10% of the pieces randomly selected. For critical projects, inspect 100%. Use a random number generator to pick which pieces to measure.
Step 4 – Do the inspection together
At the supplier’s warehouse, lay the selected pieces on a flat surface. Measure each piece at the agreed points. Write down the results on a joint inspection report6. Both parties sign.
If a piece fails, set it aside. Count how many fail. If the failure rate exceeds 5% of the inspected sample, reject the whole lot.
Step 5 – Take photos and videos
For each measured piece, take a photo showing the measurement reading and the piece. Take a video of the inspector walking along the bundle. This is your evidence.
Step 6 – Sign the joint inspection report
The report should list:
- Date and location
- Inspector names and companies
- Sample size
- Number of pieces measured
- Number of pieces that passed
- Number of pieces that failed (with photos attached)
- Action taken (reject, replace, or accept with discount)
Both buyer and supplier sign. Then the good steel is loaded.
Cost vs. benefit
| Shipment size (tons) | Joint inspection cost | Cost of a dispute (rework, delay, shipping) | Savings |
|---|---|---|---|
| 50 | $500 – $1,000 | $5,000 – $20,000 | $4,000+ |
| 200 | $1,000 – $2,000 | $20,000 – $50,000 | $18,000+ |
| 500 | $2,000 – $4,000 | $50,000 – $150,000 | $46,000+ |
Joint inspection costs a little. A dispute costs7 a lot. The math is simple.
I now offer joint inspection to every buyer. One buyer in Vietnam told me: “Zora, your joint inspection saved me from a bad batch. We found 8% of the pieces had short legs. You replaced them before shipping. I received only good steel.”
Conclusion
Write every detail in your contract. Agree on tools and methods. Know the rejection limits. And do a pre-shipment joint inspection.
My Personal Insights (from 10+ years in marine steel export)
I am Zora Guo. My team in Liaocheng supplies marine L-shaped steel with full dimensional inspection. We welcome joint inspections with SGS or your own engineer. We also provide measurement photos and videos before shipping. Send me an email at sales@chinaexhaustfan.com or visit cnmarinesteel.com. Tell me your required sizes and tolerances. I will send you a contract clause and a joint inspection plan.
-
Understanding pre-shipment joint inspections can help you avoid costly disputes and ensure quality. ↩ ↩ ↩ ↩
-
Discover the role of these inspection companies in ensuring product quality and compliance. ↩ ↩ ↩ ↩
-
Learn how joint dimensional inspections can safeguard your investments and improve supplier relationships. ↩ ↩ ↩ ↩
-
Learn how a quality engineer can enhance the inspection process and ensure compliance. ↩ ↩ ↩
-
Understanding sampling plans can enhance your inspection process and ensure thorough evaluations. ↩
-
A comprehensive joint inspection report is crucial for accountability and dispute resolution. ↩
-
Understanding dispute costs can motivate you to implement preventive measures like inspections. ↩