
The truck arrives at your yard. It carries your order of L-shaped steel for a critical shipbuilding project. You sign the delivery note. But what happens next? If you simply store it, you risk costly surprises later: wrong dimensions, poor surface quality, or mismatched certification. A proper inspection upon delivery is your first and best defense against project delays and budget overruns.
Inspect L-shaped steel upon delivery by first verifying the Mill Test Certificate matches the order. Then, conduct a visual check for damage, rust, and straightness. Use measuring tools to confirm leg dimensions, thickness, and length. Finally, check for the proper mill stamps and markings that confirm the grade and heat number.
This process is not just about ticking boxes. It is a systematic quality gate that protects your project. Many of our clients, like Gulf Metal Solutions, have faced "quality inconsistency" in the past. A good inspection routine turns uncertainty into confidence. Let’s build that routine step by step.
What is the L angle1 in steel structure?
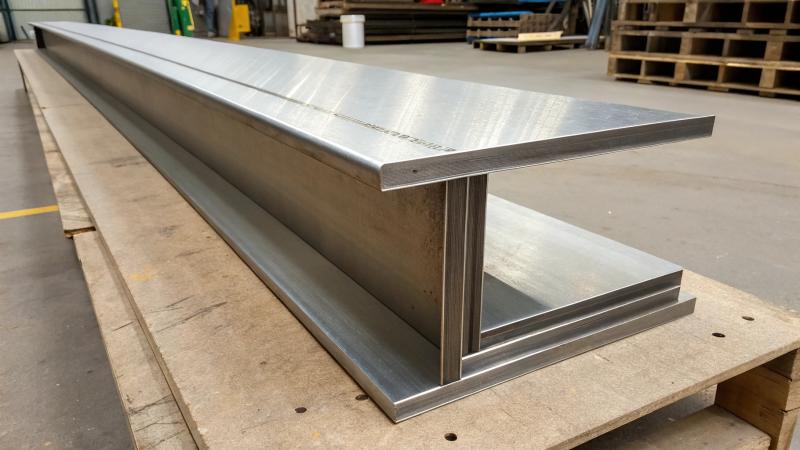
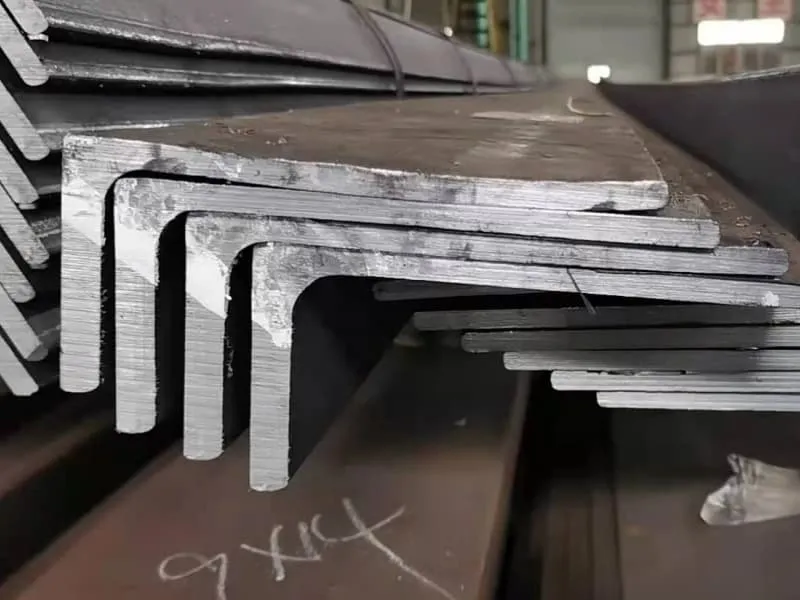
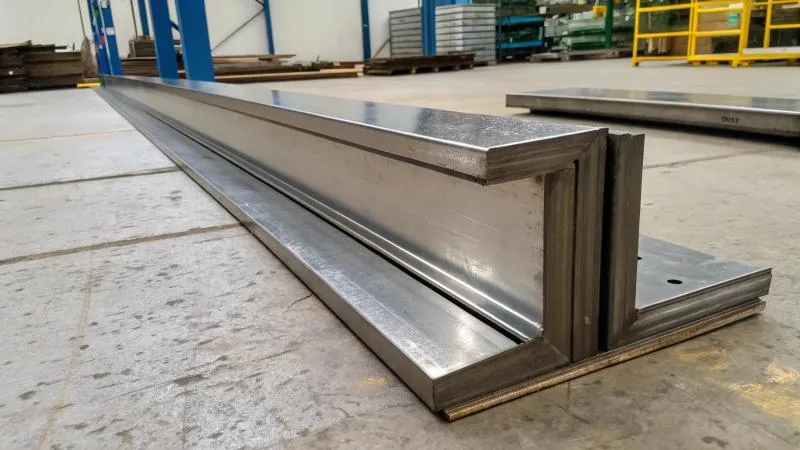
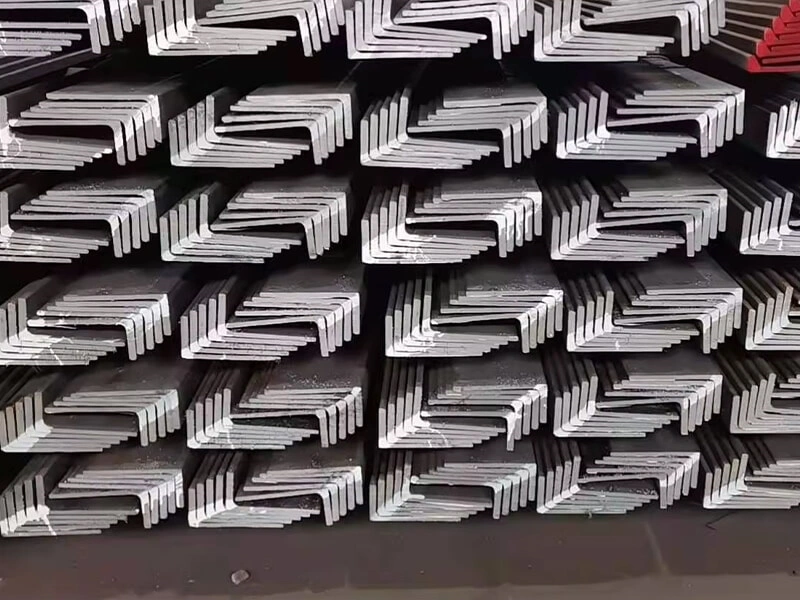
Before you inspect something, you must know what it is supposed to be. In steel structures, especially in ships, the "L angle1" refers to a specific rolled steel section. Its cross-section looks like the letter "L", with two legs meeting at a 90-degree angle. It is not just a bent piece of metal. It is a standardized structural component with defined dimensions, tolerances, and material properties.
The L angle1 in steel structure is a load-bearing member with an L-shaped cross-section, used as a stiffener, frame, or bracket. It provides strength and rigidity by increasing the section modulus of plates it’s attached to, and is specified by its leg lengths and thickness (e.g., L 100x75x10mm).
Understanding its role tells you what to look for during inspection. A bent or out-of-tolerance L angle will not perform its function correctly.
The Functional Anatomy of an L-Angle: What Makes It Work
The L-angle’s value comes from its geometry and its material. When you inspect it, you are checking the health of both.
1. Geometric Integrity: The Shape Must Be Correct
The 90-degree angle and straight legs are not aesthetic preferences. They are functional requirements.
- The 90-Degree Angle: This allows for easy connection to other flat plates or sections. A deviation from 90 degrees (called "out-of-square") makes fit-up difficult during welding. It can create gaps that weaken the joint.
- Leg Length and Thickness: These dimensions determine the angle’s section modulus2, which is its resistance to bending. If a leg is undersized, the angle is weaker than designed.
- Straightness: The entire length of the angle must be straight. A bow or twist makes it impossible to align properly during assembly.
2. Material Integrity: It Must Be the Right Steel
An L-angle can have perfect shape but be made of the wrong material.
- Grade: Marine L-angles are rolled from specific steel grades like ABS Grade A, AH32, or AH363. The grade defines the yield strength (e.g., 235 MPa for A, 355 MPa for AH36).
- Surface Condition: The surface should be free of deep pits, heavy scale, or rolling defects. These can be stress concentrators or hide cracks. A clean surface also ensures better paint adhesion and weld quality.
- Edges: The edges are typically rounded (have a fillet). Sharp edges are dangerous and can initiate cracks.
3. Traceability: The Link to Certification
Each legitimate L-angle is part of a traceable batch.
- Mill Stamps: The steel mill stamps or paints markings on the angle. These usually include:
- The grade (e.g., AH36)
- The heat number or batch number
- The mill’s logo or identification
- Sometimes the size
- Purpose of Stamps: These markings physically link the piece of steel in your yard to the Mill Test Certificate (MTC)4. The MTC is the document that proves the chemical and mechanical properties of the steel from that heat.
When you receive a shipment, you are not just receiving "some angles." You are receiving certified structural components. Your inspection must verify that the physical product matches the description on the paperwork. This is the core principle that prevents the "quality inconsistency" our clients experienced before. A missing stamp or a certificate that doesn’t list the correct heat number is a major red flag.
How do you test for steel structure?
Testing a steel structure happens at different stages: at the mill, during fabrication, and on the finished structure. For incoming materials like L-shaped steel, your "test" is primarily a verification process1. You are not conducting destructive lab tests. You are verifying that the material delivered is the same as the material that was tested and certified by the mill. Your tools are documents, measuring tools, and your eyes.
You test steel structure materials through verification: checking mill certificates against the order, performing visual inspection for defects2, taking dimensional measurements, and verifying material markings. For the fabricated structure, non-destructive testing (NDT) like ultrasonic or magnetic particle inspection checks weld quality and integrity.
The testing philosophy shifts from "proving properties" at the mill to "confirming identity and condition" at your site. Let’s outline the standard verification protocol.
The On-Site Verification Protocol for Structural Steel
This is a practical sequence you can follow when the truck is unloaded.
Phase 1: Document Verification (The Paper Trail)
This is the first and most critical step. Do not unload before completing this.
- Receive the Mill Test Certificate (MTC)3: The driver or shipping agent should provide a copy. The supplier should have sent it earlier.
- Cross-Check the MTC with Your Purchase Order (PO):
- Grade: Does it say ABS AH36, exactly as you ordered?
- Standard/Specification: Does it reference the correct standard (e.g., ASTM A6, EN 10025)?
- Size/Thickness: Does the certificate cover the size you ordered (e.g., L 150x100x12)?
- Heat Number/Batch Number: Note this number. You will need to find it on the steel.
- Chemical & Mechanical Results: Scan to ensure values (Yield Strength, Tensile, Chemical Composition) are within the standard limits. Look for a stamp or signature from the mill’s quality department.
Phase 2: Visual and Dimensional Inspection (The Physical Check)
Now inspect the material itself. Use a simple checklist.
- Visual Condition:
- Look for obvious physical damage from transport: deep scratches, dents, or bending.
- Check for excessive rust. Light surface rust is normal for raw steel. Heavy, pitting rust is a problem.
- Examine the surface finish. It should be consistent. Look for rolling defects like seams, laminations, or heavy scale.
- Dimensional Check:
- Leg Length and Thickness: Use a caliper or micrometer. Measure the leg widths and the thickness at several points along several pieces. Compare to the ordered size and the tolerances in the standard (e.g., ASTM A6 allows ±2mm on leg length for certain sizes).
- Straightness: Lay a long straightedge along the leg and the back of the angle. Check for any bowing or twisting.
- Squareness (90° Angle): Use a precision steel square. Place it in the internal corner of the L. There should be no visible gap. For a more precise check, use a feeler gauge.
Phase 3: Marking Verification (The Traceability Link)
- Walk along the bundles or loose pieces. Find the mill stamps or paint marks4.
- Verify the stamped/painted grade and heat number match the MTC exactly.
- If markings are missing or illegible on a significant portion, this is a serious non-conformance. The material cannot be properly traced.
This systematic approach is what professional buyers like the manager at Gulf Metal Solutions expect. Our "SGS inspection support5" service means a third-party expert does this exact verification at the mill or warehouse before shipment. It provides an unbiased report, giving the buyer confidence before the steel even leaves the port. Your on-site check then becomes a quick confirmation, not a stressful investigation.
How to check the quality of steel at a site?
Checking quality on-site is about being systematic and thorough. You cannot test everything, so you use a risk-based approach. You focus on verifying critical attributes and spotting obvious defects. The goal is to catch problems early, before the steel is cut and welded into your structure. A good site check combines quick visual scans with targeted detailed measurements.
To check steel quality on-site, follow a 4-step process: 1) Verify documentation (MTC vs. PO), 2) Conduct a 100% visual inspection1 for damage and major defects, 3) Perform random dimensional checks2 on a sample of pieces, and 4) Confirm material markings for traceability3. This catches most critical issues before fabrication begins.
A chaotic site check is useless. You need a clear plan and the right simple tools. Let’s build a practical field guide.
The Site Quality Check Field Guide
Assume you are the site supervisor. The steel has just been offloaded. Here is your action plan.
Step 1: Prepare Your Tools and Team
You need basic equipment:
- Documents: Copy of the Purchase Order (PO)4, received Mill Test Certificate (MTC)5.
- Measuring Tools: Tape measure, caliper/micrometer, steel straightedge (2m), precision square, feeler gauge.
- Inspection Aids: Good lighting, marker pen for tagging suspect pieces, camera (for documenting issues).
- Personnel: At least two people—one to inspect, one to record findings.
Step 2: Execute the Layered Inspection
Do not try to check every dimension on every piece. Use a layered approach.
Layer 1: Documentation & Marking Scan (Quick, 100%)
- Walk around the delivered lot. Quickly look for the mill stamps on the steel. Is the grade (e.g., AH36) visible? Are the stamps clear? This gives an immediate sense of traceability3.
- Acceptance Criteria: All bundles or a representative majority of pieces should have legible markings.
Layer 2: Gross Visual Inspection (Quick, 100%)
- Look for obvious problems: severe bending, heavy impact damage, deep rust pits, or unacceptable surface conditions (e.g., deep rolling marks).
- Acceptance Criteria: No damage that would affect the structural use6 or require excessive rework.
Layer 3: Detailed Dimensional Sampling (Slow, 5-10% sample)
- Select random pieces from different bundles. For L-angles, check:
- Leg Length A & B: Use a caliper. Measure at both ends and the middle.
- Thickness (t): Use a micrometer. Measure away from the edges.
- Squareness: Use the precision square and feeler gauge. Measure the gap, if any.
- Straightness: Use the straightedge along the length of a leg.
- Compare measurements to the ordered size and the standard’s tolerance table (e.g., for an L 100x100x10, leg length tolerance might be ±2mm, thickness tolerance ±0.5mm).
- Acceptance Criteria: Measurements must fall within the specified tolerances. If one piece in the sample fails, increase the sample size. If multiple fail, consider rejecting the batch.
Layer 4: Verification Against MTC (Desk Work)
- Back in the site office, ensure the heat number on the stamped steel matches the MTC.
- File the MTC with the project records. This is required for future class surveys or audits.
What to Do If You Find a Problem
- Isolate the non-conforming material7. Mark it clearly (e.g., with red paint).
- Document it. Take photos and note the issue on an inspection report.
- Notify your supplier immediately. Send them the evidence. A reliable supplier will have a process to address this, such as arranging for replacement material or a credit.
This process empowers the site team. It turns quality from a vague hope into a managed activity. When Gulf Metal Solutions mentioned "stable quality," it means the steel passes this kind of site check consistently, shipment after shipment. There are no surprises.
What are the 4 methods of inspection?
Inspection methods range from simple to sophisticated. For marine steel, we generally categorize them into these four broad groups: Visual Inspection (VT)1, Dimensional Inspection2, Documentation Review3, and Non-Destructive Testing (NDT)4. Each method answers a different question about the steel’s suitability. A comprehensive inspection plan uses all four, either at different stages or by different parties.
The four primary inspection methods for marine steel are: 1) Visual Inspection (VT)1 for surface defects, 2) Dimensional Inspection2 for size and straightness, 3) Documentation Review3 for material certification, and 4) Non-Destructive Testing (NDT)4 for internal and surface flaws not visible to the eye.

Understanding these methods helps you plan who does what and when. You might do VT and dimensional checks yourself, while relying on the mill for NDT and on a third party for documentation review.
A Deep Dive into the Four Inspection Pillars
Let’s explore what each method entails, who typically performs it, and what it finds.
1. Visual Inspection (VT)1
This is the most basic and universally used method.
- What it is: Examining the steel with the naked eye, sometimes aided by magnifying glasses, mirrors, or good lighting.
- What it finds: Surface cracks, pits, heavy rust, rolling defects (seams, laps), physical damage (dents, bends), weld defects (undercut, porosity), and the presence/legibility of markings.
- Who does it: Everyone. The mill worker, the third-party inspector, the truck driver, and your site team should all do a visual check at their stage.
- Limitation: It only finds surface issues. It cannot see inside the material.
2. Dimensional Inspection2
This verifies that the steel is the right shape and size.
- What it is: Using measuring tools (tape, caliper, micrometer, straightedge, square) to check lengths, widths, thicknesses, straightness, flatness, and squareness.
- What it finds: Material that is out of the specified dimensional tolerances. For an L-angle, this could be an undersized leg, excessive thickness variation, or a leg that is not 90 degrees.
- Who does it: The mill performs this during production. The buyer or their representative (like an SGS inspector) performs it as a verification during pre-shipment or upon delivery.
- Standard Reference: Tolerances are defined in standards like ASTM A65 or EN 10029 for plates, and ASTM A484 for stainless.
3. Documentation Review3
This is the administrative backbone of quality assurance.
- What it is: A systematic check of all paperwork: Purchase Order, Mill Test Certificate, Third-Party Inspection Report, packing list, commercial invoice.
- What it finds: Errors in grade specification, missing test data, non-matching heat numbers, or missing class society approval stamps on the certificate.
- Who does it: The buyer’s procurement or QA department, and the class surveyor. This is a critical step that requires attention to detail.
- Our Role: We facilitate this by providing clear, correct, and complete documentation. Our SGS support generates an additional, trusted document for review.
4. Non-Destructive Testing (NDT)4
This is a family of advanced techniques used to find hidden flaws without damaging the steel.
- Common NDT Methods for Steel:
- Ultrasonic Testing (UT)6: Uses high-frequency sound waves to find internal flaws like laminations, inclusions, or voids. Often used on thick plates.
- Magnetic Particle Inspection (MPI)7: Finds surface and near-surface cracks in ferromagnetic steel (like carbon steel). It is excellent for checking welds and critical areas.
- Dye Penetrant Inspection (DPI)8: Finds surface-breaking cracks. Used on any material, including stainless steel.
- Radiographic Testing (RT): Uses X-rays or gamma rays to see inside the material, like checking a weld root. Less common for raw material inspection.
- Who does it: Certified NDT technicians. Mills perform UT on plates as part of their standard process. Third-party inspectors or shipyard QA teams perform MPI/DPI on welds and critical components.
For an L-shaped steel delivery, Methods 1, 2, and 3 are your responsibility upon receipt. Method 4 (NDT) is typically done at the mill (UT on the slab) and later at the shipyard on welds. By understanding all four, you know the full scope of quality assurance. You can demand the right evidence (a UT report for plates, an MPI report for welds) from your supplier or subcontractor. This comprehensive view is what separates professional project management from guesswork.
Conclusion
A thorough inspection of L-shaped steel upon delivery is a simple but powerful risk management tool. By systematically checking documentation, dimensions, surface condition, and markings, you transform delivered goods into certified, reliable assets for your project, ensuring a smooth path to completion.
-
Explore this link to understand the basics and importance of Visual Inspection in ensuring steel quality. ↩ ↩ ↩ ↩ ↩ ↩ ↩ ↩
-
Learn about Dimensional Inspection to ensure steel meets specified tolerances and quality standards. ↩ ↩ ↩ ↩ ↩ ↩
-
Discover the critical role of Documentation Review in quality assurance and compliance in steel procurement. ↩ ↩ ↩ ↩ ↩ ↩ ↩
-
Find out about NDT methods to uncover hidden flaws in steel without causing damage, ensuring safety. ↩ ↩ ↩ ↩ ↩ ↩
-
Explore ASTM A6 standards to understand the specifications for steel plates and their tolerances. ↩ ↩ ↩
-
Learn about Ultrasonic Testing to see how it detects internal flaws in steel, enhancing quality control. ↩ ↩
-
Discover how MPI is used to find surface cracks in steel, especially in critical weld areas. ↩ ↩
-
Understand DPI techniques to identify surface-breaking cracks in various materials, including steel. ↩